
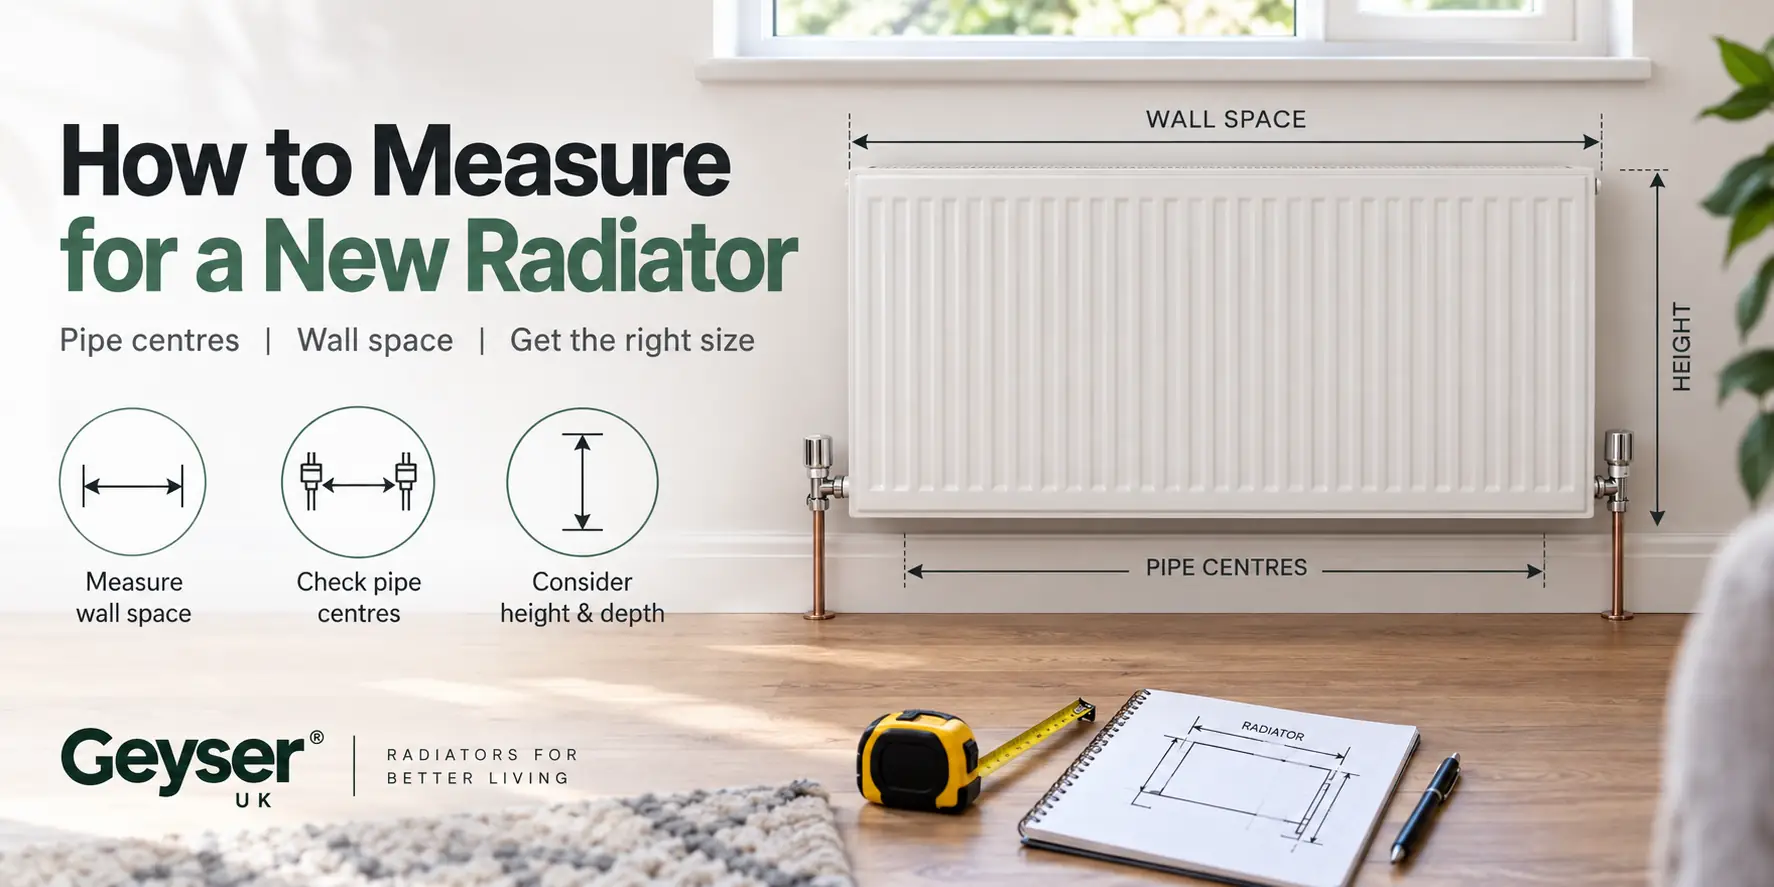
Almost everything about buying a radiator online is straightforward until you get to the measurements. People pick a finish in ten minutes, then spend a fortnight not ordering because they are not certain the thing will fit, and nobody wants to take delivery of a radiator that is 40mm too wide for the gap.
The good news is that there are only four measurements that matter, and one of them decides most of the outcome. Take them properly once, write them down, and the rest of the decision becomes simple.
The Four Measurements
| Measurement | Where from | What it decides |
|---|---|---|
| Available width | Obstruction to obstruction, at radiator height | Maximum radiator width, valves included |
| Available height | Finished floor to underside of sill | Maximum radiator height |
| Pipe centres | Centre of one pipe to centre of the other | Whether you need pipework altered |
| Projection | Wall out to the nearest obstacle | How many columns you can have |
Measure the width at the height the radiator will actually sit, not at skirting level. Skirting boards, dado rails, boxed in pipework and plaster that bulges near a corner all narrow the gap in places you did not check.
Pipe Centres: the Measurement That Decides Everything
Pipe centres is the distance between the two pipes coming out of your floor or wall, measured from the middle of one to the middle of the other. It is the single most useful number you can give us, and it is the one most people have never heard of.
It matters because your new radiator has to land on those two pipes. If the pipe centres and the radiator's valve centres line up, fitting is an afternoon. If they do not, a plumber has to lift floorboards or chase a wall, and a simple swap becomes a job.
To take it, measure centre to centre with a tape across the two pipes. Do it at the floor, not at the top of the valve, because older valves can lean. Write the number down along with which way the pipes emerge, up through the floor or out of the wall, because that determines the valve shape you need.
Allowing for the Valves
This is where the 40mm surprises come from. The width on a product page is the radiator body. The valves stick out beyond it at each end, and they are not small.
As a working rule, allow roughly 50mm to 80mm at each end for a valve body, so 100mm to 160mm on the pair. Always check the specific valve's own dimensions before committing, because finishes and styles vary and a traditional valve is usually chunkier than a modern one.
Valve shape follows your pipework rather than your taste. Angled valves suit pipes coming up out of the floor, corner valves suit pipes coming out of the wall, and straight valves suit pipes that arrive in line with the valve tail. Our guide to angled, corner and straight valves covers which shape belongs on which pipe run.


Measuring a Radiator You Are Replacing
If something is already on the wall, you have most of the answers in front of you. Take these five and you are done.
- Pipe centres. Centre to centre at floor level, as above.
- Existing radiator width and height. The body only, not including the valves.
- Existing projection. Wall face to the front of the radiator.
- Floor to the centre of the valve inlet. This tells a plumber how much vertical adjustment is involved.
- Which side the pipes are on. Photograph it. It takes two seconds and answers questions you have not thought of yet.
A photograph of the existing installation, taken straight on with the tape in shot, is worth more than a page of numbers. If you are moving the radiator to a different wall entirely rather than swapping it in place, our guide to moving a radiator explains what that involves.
Widths come in fixed steps rather than any number you like, because a column radiator is assembled from identical sections. On our column range that is 90mm steps for horizontal radiators, starting at 609mm, and 45mm steps on the tall verticals, starting at 294mm. So measure your gap, then take the nearest size below it once the valve allowance is subtracted.
Measuring a Wall With Nothing On It
A new wall is harder, because you are inventing the pipe positions rather than working around them. Work in this order.
Start with the height. Floor to the underside of the sill, less about 150mm above the radiator and about 120mm below it, gives you the tallest radiator that will work. Those gaps are what let air move through the radiator, and closing them up costs you real output.
Then take the width, at the height the radiator will sit, from obstruction to obstruction. Subtract your valve allowance. Whatever is left is the widest radiator body you can order.
Finally, check the projection. Stand at the wall and look at what is nearest: a door swing, a dining chair pulled out, the edge of a worktop. If you have 200mm of clear space you can have six columns and a great deal of heat. If you have 120mm, you are choosing between two and three columns, and our guide to how column depth changes heat output shows what each one gives you.
Five Mistakes Worth Avoiding
- Measuring the gap and ordering that width. The valves need their 100mm to 160mm and they will not negotiate.
- Measuring at skirting level. The gap at radiator height is often different, and usually smaller.
- Forgetting the carpet. If the floor is coming up or a thick carpet is going down, the finished floor level moves and takes your clearance with it.
- Measuring the old radiator including its valves. Product pages quote the body, so comparing the two gets you a radiator that is too small.
- Assuming pipe centres match. Two radiators of identical width can have different valve centres. Check both numbers.
Frequently Asked Questions
What are radiator pipe centres?
The distance between the two pipes that feed the radiator, measured from the centre of one to the centre of the other. It tells you whether a new radiator will land on your existing pipework or whether pipes need moving, which is the difference between a quick swap and a plumbing job.
How much space do radiator valves add to the width?
Roughly 50mm to 80mm at each end, so 100mm to 160mm across the pair. Traditional styles tend to be at the larger end and modern designer valves at the smaller. Always check the specific valve's dimensions, and subtract the allowance from your gap before choosing a radiator width.
Does a new radiator have to be the same size as the old one?
No. It has to fit the space and it has to meet the room's heat requirement, and neither of those obliges you to match the old dimensions. What does need attention is the pipe centres, since different dimensions usually mean the pipework needs adjusting to suit.
How much clearance does a radiator need?
Around 120mm below, 150mm above and at least 30mm behind. Those gaps let cool air enter at the bottom and warm air leave at the top, which is how a radiator does most of its work. Closing them up reduces output noticeably.
If in Doubt, Send Us the Numbers
Measuring is the only genuinely technical part of buying a radiator, and it is worth five careful minutes with a tape rather than a fortnight of hesitating.
If your gap falls between two standard sizes, we can build one to your measurements instead. Call 01204 695387 with your width, height and pipe centres, or send a photograph of what is there now, and we will confirm what fits before you order anything.
0 Comment(s)